Depending on your camera type you may have additional options to configure your camera:
Motion Detection Area
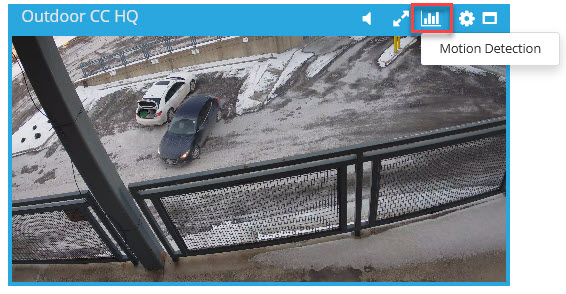
On top of the video player you should see an analytics icon. Select Motion Detection. With mobile edit your camera (setting cog) and select Motion Detection Area.
Depending on your camera type you should either see one "region" or four. In the diagram below you see four regions. Click on any region (color) to assign a "region" (or swipe left to right on mobile). This represents the area where you want motion detection to apply. Having multiple regions allow you to narrow down or exclude specific areas of interest. Simply drag and extend windows (pinch and finger drag on mobile)
Note: By default we setup your camera with only one full region. If you want to detection motion with the entire field of view, then no need to make changes.
Web and Mobile view of motion detection areas:


Here is where you can also setup sensitivity and threshold.
Sensitivity - Determines how easily the camera detects motion. Lower sensitivity means the camera is less likely to detect motion. Higher sensitivity means the camera is more likely to detect motion.
Threshold - Determines at what point the motion detection feature is triggered. A lower threshold means less motion is needed to trigger the motion detection feature. A higher threshold means more motion is needed to trigger the motion detection feature.
With this in mind, if you set your sensitivity to 1 and threshold to 100, it would be practically impossible to trigger a motion alert. Alternatively, if you set your sensitivity to 100 and your threshold to 1, this means that the slightest change could set off the trigger. By default we use a sensitivity of about 50-60 and threshold 5. Everyone's view is different, the trick is to find the correct balance.
Pan/Tilt/Zoom
***Note that this section is for the web application, for the mobile app please visit this page
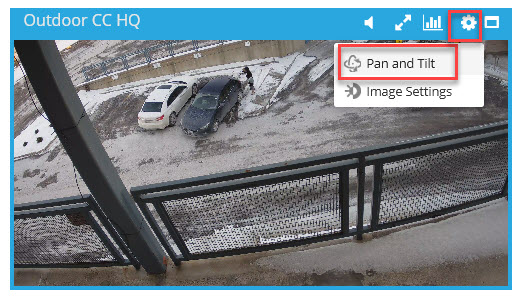
With certain camera models you may have pan/tilt and zoom capabilities. Once again select Pan and Tilt from the settings cog.
From here it's pretty intuitive to see the controls to move your camera in certain directions. Simply click the buttons to move the camera in that direction. Remember, there is always a delay of a few seconds before you see the picture move, be patient.
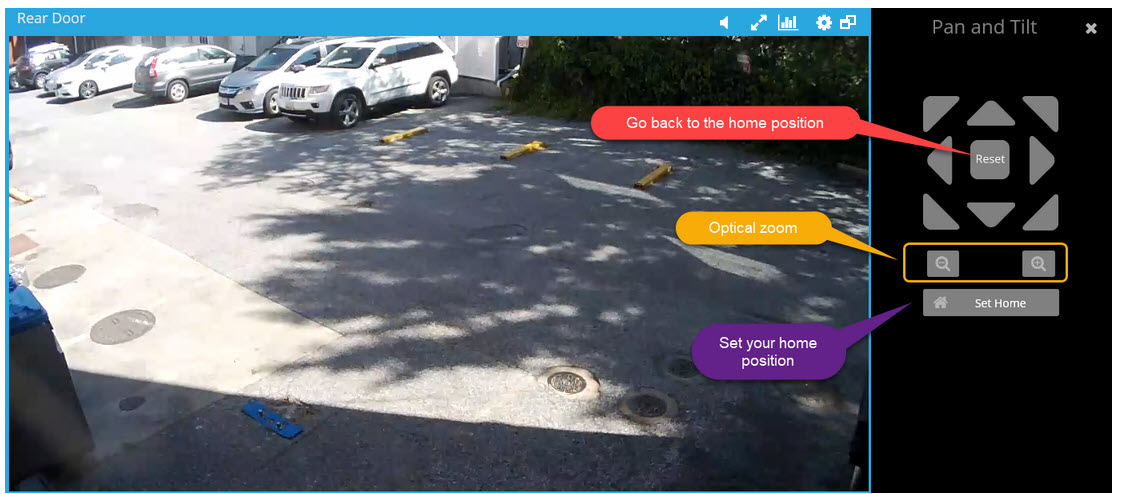
In addition to using the pan/tilt controls you can also "Set Home". Find the main viewing position and "Set Home". At any time when you use the pan/tilt controls, you can press "Reset" to bring you back to the home location.
There are two types of zoom available, digital zoom and optical zoom. In the web interface, optical zoom is only available with the plus and minus signs.
With mobile the controls are available in landscape and portrait view, they can be activated by clicking the PTZ icon at the bottom right corner of the screen. The picture below shows the different controls.
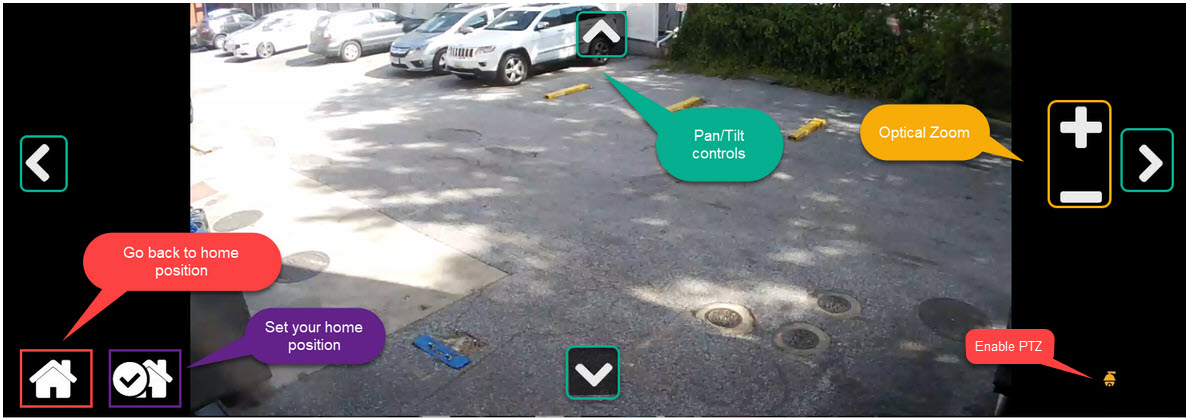
In addition the the optical zoom you can use digital zoom (on any camera type) with a simple pinch gesture of the image on your mobile device. On mobile remember to lock the view at the bottom right so that it doesn't swipe through cameras and allows you to zoom.
Image Settings
With certain camera models you may have Image Settings available.
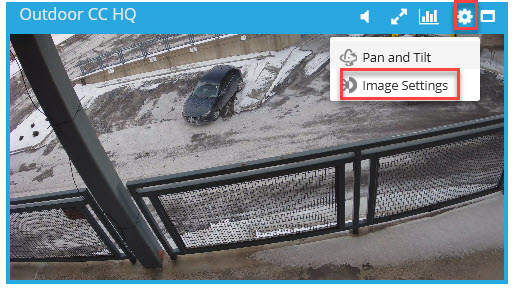
Available options which vary per camera type are:
- Brightness
- Contrast
- Saturation
- Sharpness
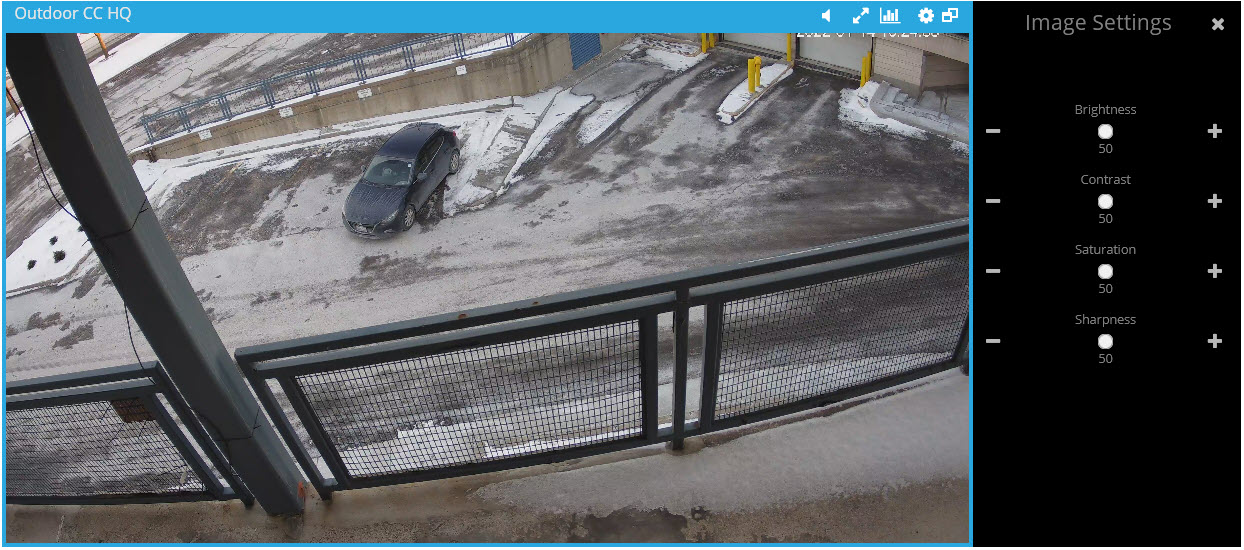
Use the slider or the plus/minus buttons to change the image. Certain scenes or lighting conditions make this a very handy option when you first setup your camera view.